While espresso may be the heart of a cappuccino or latte, milk accounts for the majority of the drink. Learning how to steam milk, therefore, is just as important as learning how to pull a shot of espresso when you’re making one of these drinks. (It’s also just as important if you’re making a macchiato or cortado, even though these drinks use less milk than cappuccinos and lattes.) Here’s how to properly steam milk for warm espresso-based beverages.
Know What You’re Trying to Create

You should steam milk the same way regardless of whether you’re making a macchiato, cortado, cappuccino or latte, as all of these drinks call for the same type of steamed milk. They’re simply different sizes. All of them combine espresso with the same, smoothly textured steamed milk.
You also should steam milk the same way regardless of whether you’re interested in making latte art. The microfoam that’s required to produce great latte art also creates the best-tasting beverages.
Properly steamed milk will be smooth and silky. It won’t have any large bubbles, nor will it look glossy like a cold glass of milk. It’ll resemble wet paint, or possibly marshmallow fluff with tiny bubbles in it. It’ll be velvety, and stick to the side of a pitcher or a spoon.
You’ll Need a Steam Wand and Pitcher
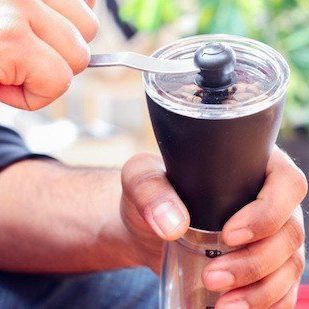
To steam milk, you will need milk (whole milk, or even half-and-half, works best), a steaming pitcher, steam wand and sanitizing towel.
The milk should be as cold as possible, without freezing it. (Milk that has been previously frozen won’t steam properly.)
To reduce the amount of milk wasted, the steaming pitcher should be appropriately sized for the beverage you’re making. For instance, don’t use a large pitcher that will hold enough milk for two lattes if you’re only making one cortado.
How to Properly Steam Milk
Once you have your milk and equipment, there are a few steps to follow before you actually begin steaming:
- If you’re using a home espresso machine or running the opening shift at a cafe, turn the machine on and let it warm up. You’ll need steam, so the water in the machine’s tanks will need to be up to temperature before you start.
- Purge the steam wand of any gunk in it by turning it on briefly. Careful, steam, and possibly boiling-hot water, will shoot out the wand’s end.
- Keep your milk in the refrigerator until you’re ready to steam, in order to keep it as cold as possible.
To steam the milk:
- Take the milk out of the refrigerator and pour it to just below the spout of your steaming pitcher. This is a rough guideline. If you run out of milk, use a little more next time. If you have a lot left over, use less.
- Put the milk back in the fridge to keep it cold for the next beverage.
- Position the wand in the pitcher so that the tip of the wand is just below the surface of the milk and slightly off center. This will create a whirlpool in the pitcher when you turn the wand on, which will help larger bubbles break down. The technique will also give you greater control over the aeration of the milk. (Aeration is simply incorporating air into the milk.)
- Turn the steam wand on.
- Steam the milk, keeping the tip of the wand just below the surface of the milk and the whirlpool circling around the pitcher. The process should sound like paper tearing. You shouldn’t hear any bubbling or screeching.
- When milk is hot to the touch, turn the steam wand off and then lower the pitcher. (If you’re using a thermometer, dairy milk’s sweetness is enhanced at about 130 to 135°F, but some people prefer their beverages hotter, often around 150°F.)
- Briefly turn the steam wand on to flush it, and wipe it off with your towel.
Once you’re done steaming milk, you should have a pitcher full of soft, velvety microfoam. If there are lots of large bubbles, you’ll need to start over with fresh milk and try again. Sometimes, just a few bubbles can be remedied. If your milk isn’t perfect microfoam, try the following
- Pop any large bubbles.
- Tap the pitcher on a counter to settle any smaller bubbles.
- Swirl the milk in the pitcher to create a smooth texture.
You should now have a pitcher full of beautifully steamed milk that’s perfect for making a beverage with.
Follow to Get More Barista Tips
At Driftaway Coffee, we’re passionate about coffee, and we like to share our passion with others. To see more barista tips like this, follow us on Twitter.


[…] one side, the lattè has an almost equal ratio of espresso and steamed milk. On the other, the macchiato is mostly espresso with a touch of milk. The lattè has a smooth and […]
[…] is particularly the case with milk-based drinks because you can’t steam milk at temperatures anywhere close to what you brew coffee at, and when you mix the two together, […]
[…] How To Steam Milk for Espresso | Driftaway Coffee […]